- Module Preparation is one of the highly critical steps that must be planned, designed and executed to minimize installation time on the roof and can begin at the office before you even get to the job site.
- Strategic String Design enables installers to minimize wire length, reduce the time it takes to clip up wires and plug in jumpers, and also provide easy access to string ends, optimizers or microinverters.
Explore the Right Way with S-5!
See how the S-5! PVKIT system helps save you labor and cost for your next installation quote. See why metal roof customers deserve and demand the S-5! family of solar PV mounting components in part one of this manufacturer spotlight.
By strategically designing module and string layouts, prepping modules in staging areas and performing repeatable installation procedures, all hurdles to installing rail-less solar can be overcome.
So, with that context, let’s move on and discuss other important considerations when it comes to module layout and wire management best practices for your next residential or commercial metal roof installation.
Correction Gaps
A correction gap is a space between two columns of modules — often necessary to align the attachment points of the modules to the roof’s seams or ribs. The gap can be as little as one inch or as large as 8-10 inches and could be placed at intervals (such as every third module) — in which case it can be used as a walk space to fulfill the role of operation maintenance (O&M).
Find S-5! Products In Our Webstore
Our industry-leading U.S. Webstore helps solar contractors save time and track online orders. But only registered users get full access to our purchasing and planning tools! Watch this video to discover our exclusive Webstore features.
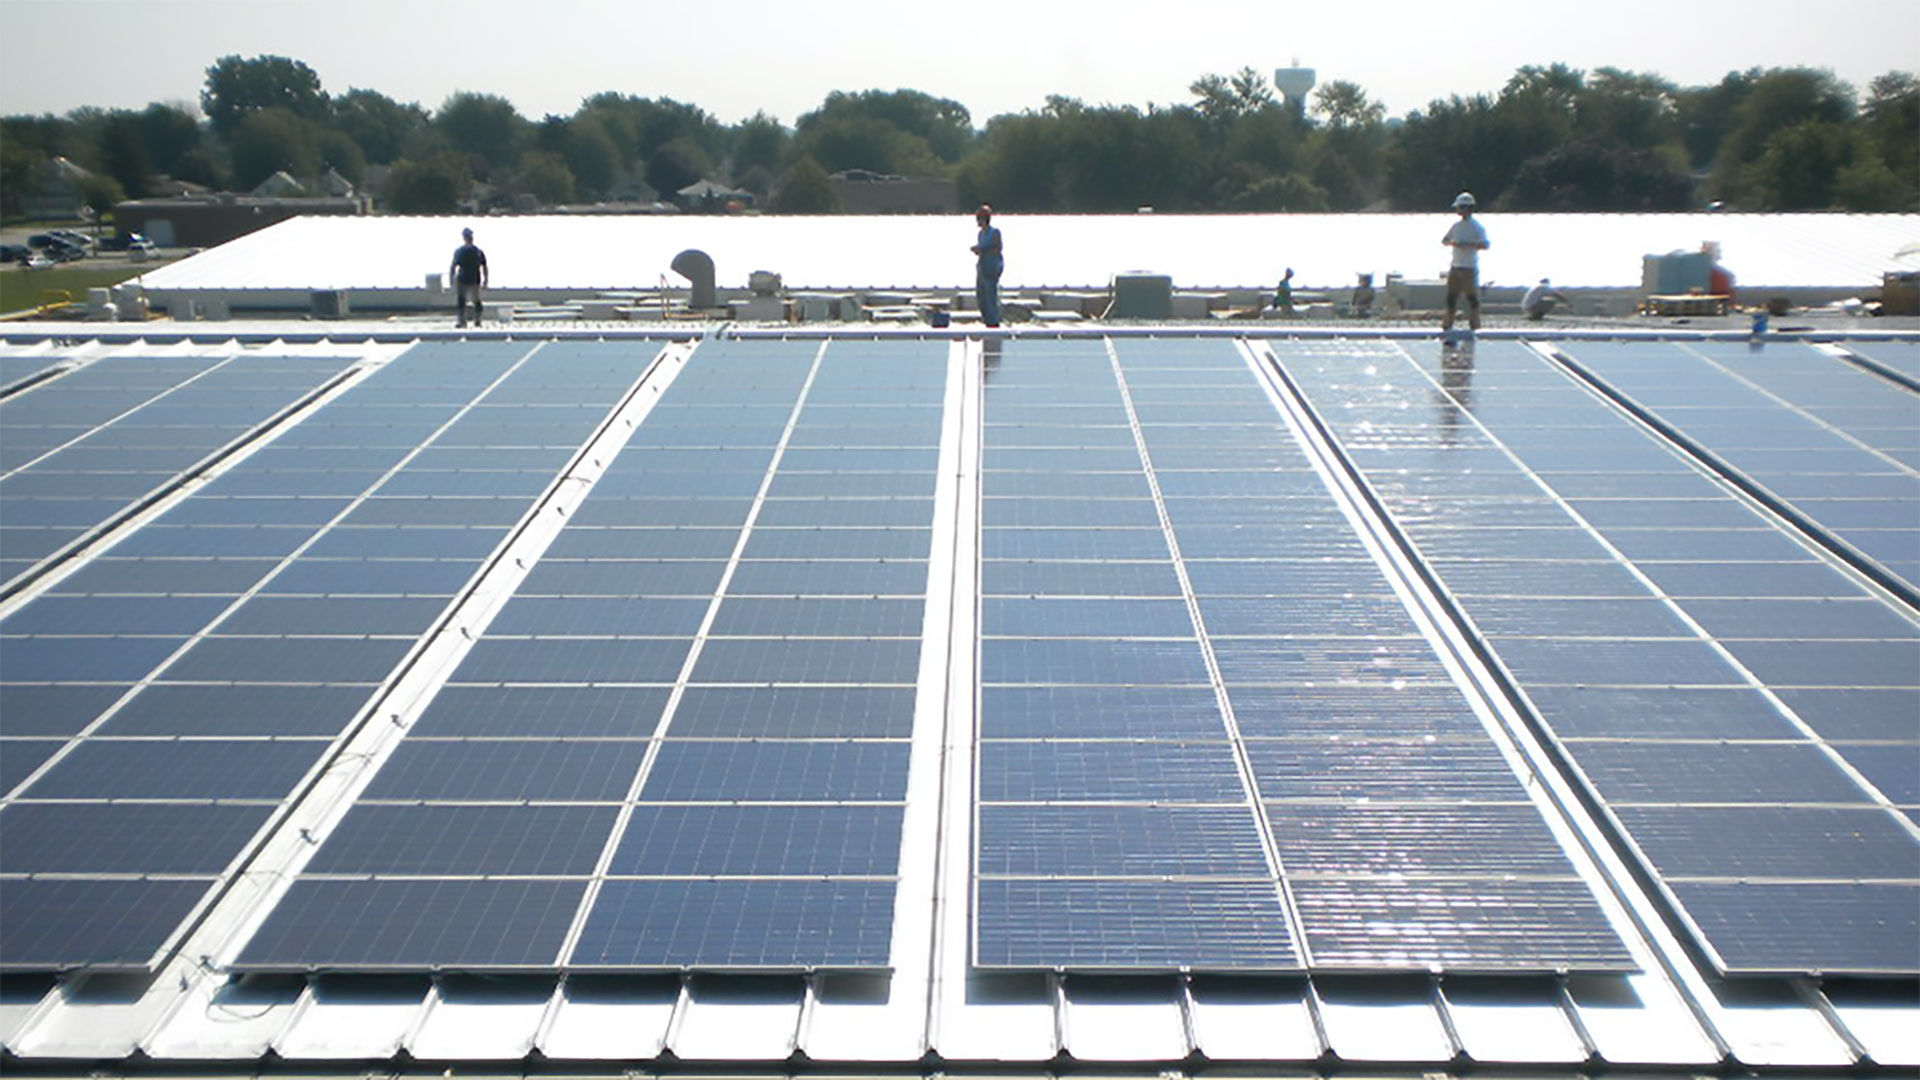
Correction Gaps can be as small as 1″ or large enough to create a narrow walk path to access all modules.
These O&M aisles provide easy access to modules without having to walk on or worry about damaging them. You can quickly pull up a module, fix connections, and/or replace it. These gaps are essentially buffered spaces that allow for modules to be tweaked, improving the alignment and squareness of the array (as many roofs are not perfectly square). Correction gaps provide the ability to walk between columns and facilitate easy inspection maintenance, wire management, and MLPE replacement.
Trunk and Branch Wire Management
As sub-arrays get bigger—even with careful string and layout design—string ends may be located deep inside the module array. Wire trays can be installed underneath the modules to save significant time; time that would otherwise be needed to tie or clip up jumper wires on a direct path from the string ends to the home run.
Wire jumpers can be routed to the wire tray, bundled inside it without any need for clips and then routed directly to the home run. This method can also help to keep wires better organized when there are many strings to install, and it is certainly a good method if you have no choice but to bring a lot of jumpers to home runs or back to one central point.
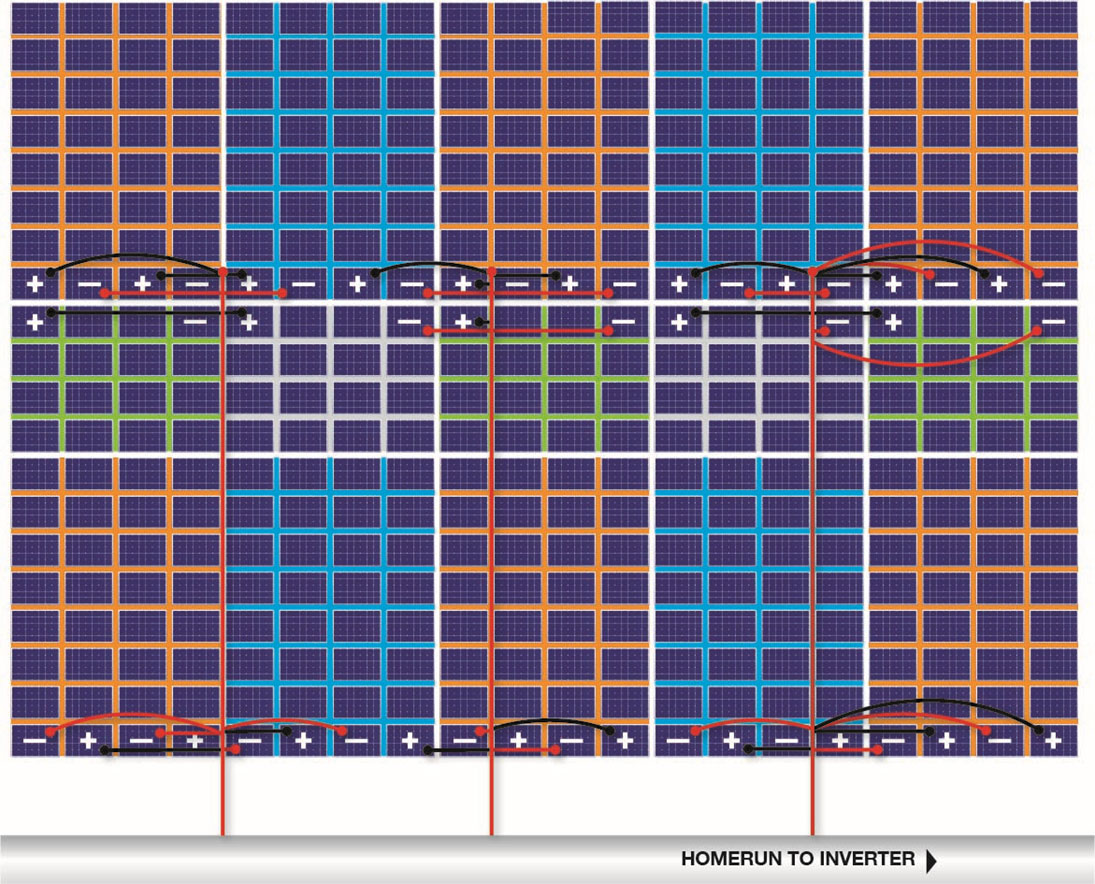
Trunk & Branch method saves installation time; wire trays minimize effort to route jumpers to home runs.
Module-Level Power Electronics (MLPE)
Both types of MLPE — optimizers and microinverters — have continued to gain traction in the solar market and are now more commonplace in rooftop projects of all sizes. MLPE can usually be installed by mounting to the module frame or directly to the roof. For some, there are specific reasons to mount to the roof, such as manufacturer requirements.
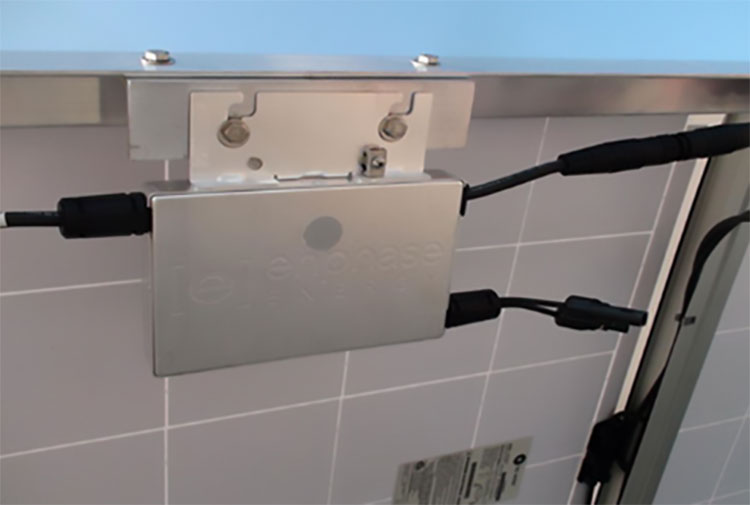
Microverter directly attached to module frame.
But, in most cases, mounting to the module frame is most convenient and economical. Mounting optimizers directly onto the modules allows for clean wire management that can be prepped in advance, making it easy for the installers who are placing the modules.
Microinverters are a bit different in function, but still great to mount directly onto the modules. You can directly attach a microinverter onto the module creating something similar to an AC module. Then, it is a matter of managing the trunk cable, which can be accomplished with several wire management products intended for this purpose. From there, it’s just plug and play.
The S-5! Solution
S-5! offers a rail-less, direct-attach™ solar mounting solution for metal roofs. S-5-PVKIT®2.0 pre-assembled components provide a simple, economical method for installers to “lay & play” modules with tested, engineered, attachment of modules to any metal roof type. Even first-time installers of S-5’s rail-less system have reported installation times of 90 seconds/module—a savings of up to 50%, so it is certainly worth a look. For information, videos and webinars on this topic and more, please visit www.s-5.com or ask your BayWa r.e. regional sales rep for more advice.
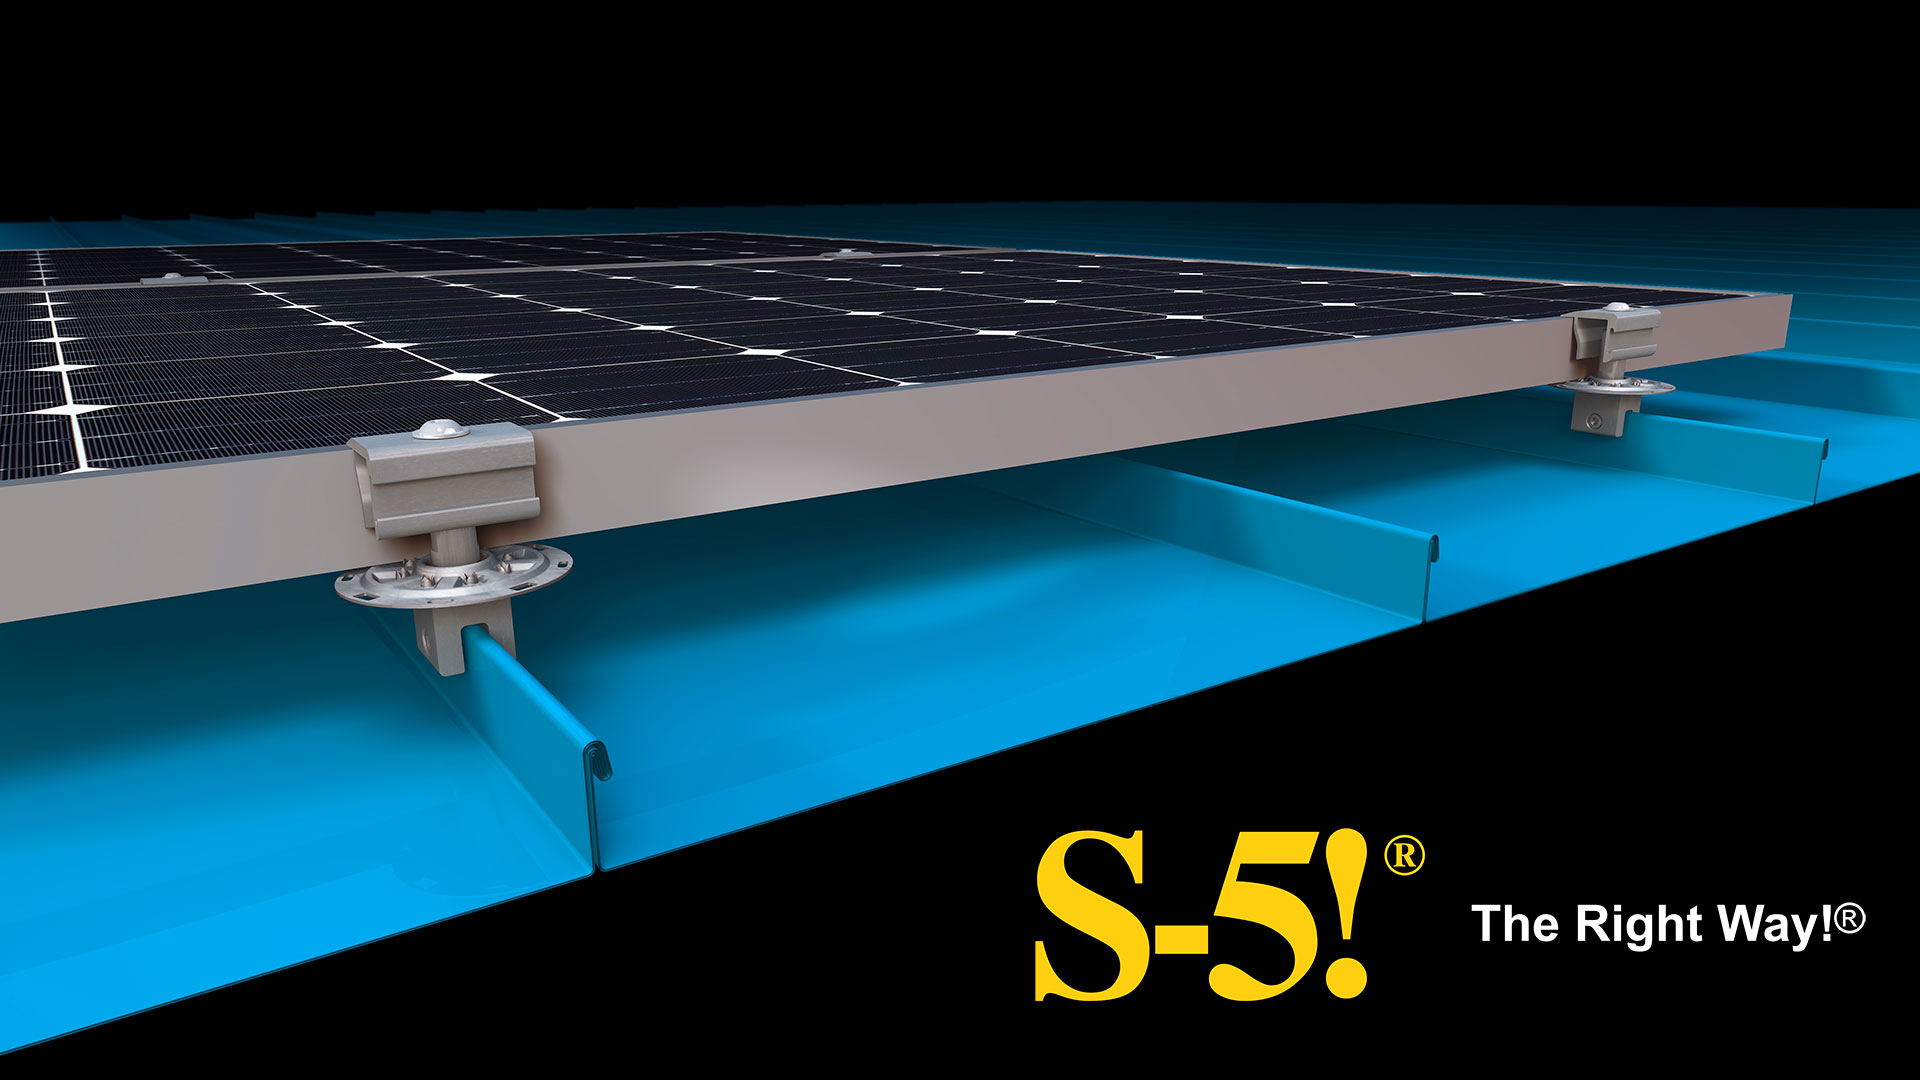
S-5-PVKIT 2.0 offers a rail-less, direct-attach™ solar mounting solution for metal roofing.
If you’re interested in more product-related content, check out our show for solar nerds: Solar Tech Talk! Watch new episodes at solar-distribution-us.baywa-re.com/solar-tech-talk/
The BayWa r.e. U.S. Webstore is proud to feature equipment from S-5! — one of our trusted manufacturing partners. Visit solar-store-us.baywa-re.com/manufacturer/s-5 to see our offerings and connect with our regional sales teams to learn more about our SplitPay procurement financing program.
BayWa r.e. Solar Distribution supplies residential and commercial solar installers in the United States with quality solar + storage components, forecasting, business planning advice, and a community of experts. Visit www.solar-distribution.com to engage with our team, read our industry insights articles, and stream our Solar Tech Talk podcasts and recorded webinars on YouTube and Spotify. Follow us on LinkedIn and Facebook to stay connected. Ask us about our Financing Program and use our industry-leading Webstore to save time, get gear shipped, and get jobs done!
Part of the BayWa r.e. Global family of renewable energy companies.
